Blog Post Week 3 & 4 Lego Blocks
Part 1
This week we were given another assessment task, but where asked to work in a group, as a group we were given a Lego kit to recreate using Maya.
We would have to create each of the individual Lego parts then use those parts to assemble the various permutations that could be made with the Lego kit.
To achieve the goal we would all need to be working to the same scale while creating our parts then we would need to combine them all together so we can assemble the different models.
Along with creating the part and assembling the models we also need to texture the parts to match the correct colours of the real Lego parts, including making some of the parts transparent matching the material of some parts.
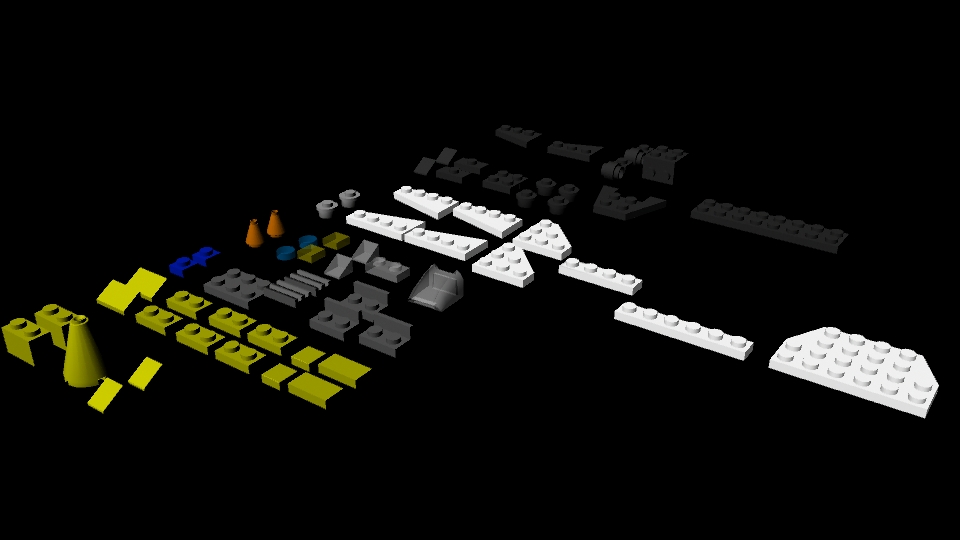
To start we agreed in our group to split the Lego parts evenly so we would all be making the same number and once we had finished them we would texture them.
Once the parts where dived between the group I started to work on my parts, the parts I where given where basic compared to some of the others, so I was able to complete them quickly.
In class our tutor provided us with the Lego kit to look at and this was very helpful for judging the sizes of the parts in relation to each other, I was able to measure parts that I didn’t know the dimensions of against parts I did know the dimensions of so that I could actually recreate the parts.
Once the parts where created I exported the models individually and then archived them all into a zip file so that they could be shared with the rest of the group.
After I shared my parts with the group a new project folder was created with all the parts created so far placed in one scene with materials applied.
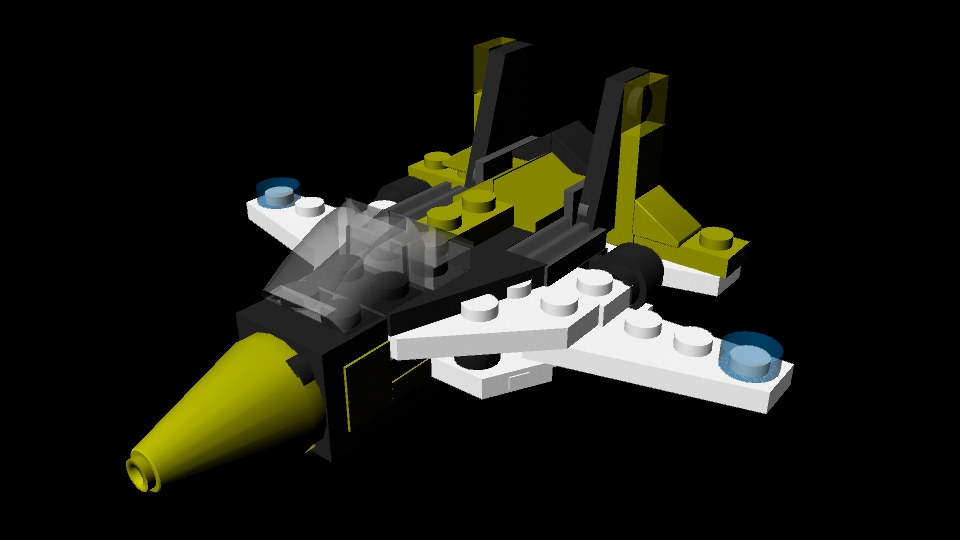
I downloaded this new project file and stared work on assembling the plane model. Before I stared I organized all the parts I would need making copies of parts that I needed more of one of once this was done I needed to adjust the materials in the hypershader windows because every time I copied an object it would duplicate the material applied to it.
Once I had removed the duplicated textures I reapplied the remaining textures to the copied parts that were missing the textures, I did this to keep my workspace organised and so that I could make adjustments to the one material and it would update to all parts sharing that material.

Now that I had all the parts I needed and my work space organized I saved the scene and made a copy so I could come back to this stage before I assembled the pieces and create a different model if I wished to.
I start assembling the model following the guide provided and use the “Snap Together Tool” to roughly position the parts together before adjusting them using the movement tools. This process is time consuming but simple.
Part 2
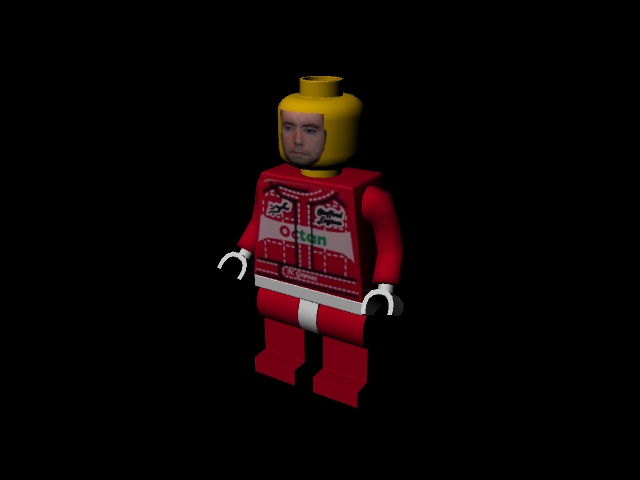
Now that I had the model assembled I moved onto the next part of the assessment to create a Lego avatar of myself based on the Lego minifigures model provided.
I created the UV map of the model and opened the map in Photoshop where I added my own face to the map and made it look like the Lego Racing Drive minifigure to reflect my interest in Formula 1 racing. Once I had finished creating the UV map I created a material from it and applied it to the model seen below.
Links:
https://dl.dropboxusercontent.com/u/6112339/3d%20Modeling%20%26%20Animation/my%20bricks.zip
https://dl.dropboxusercontent.com/u/6112339/3d%20Modeling%20%26%20Animation/Lego.zip